
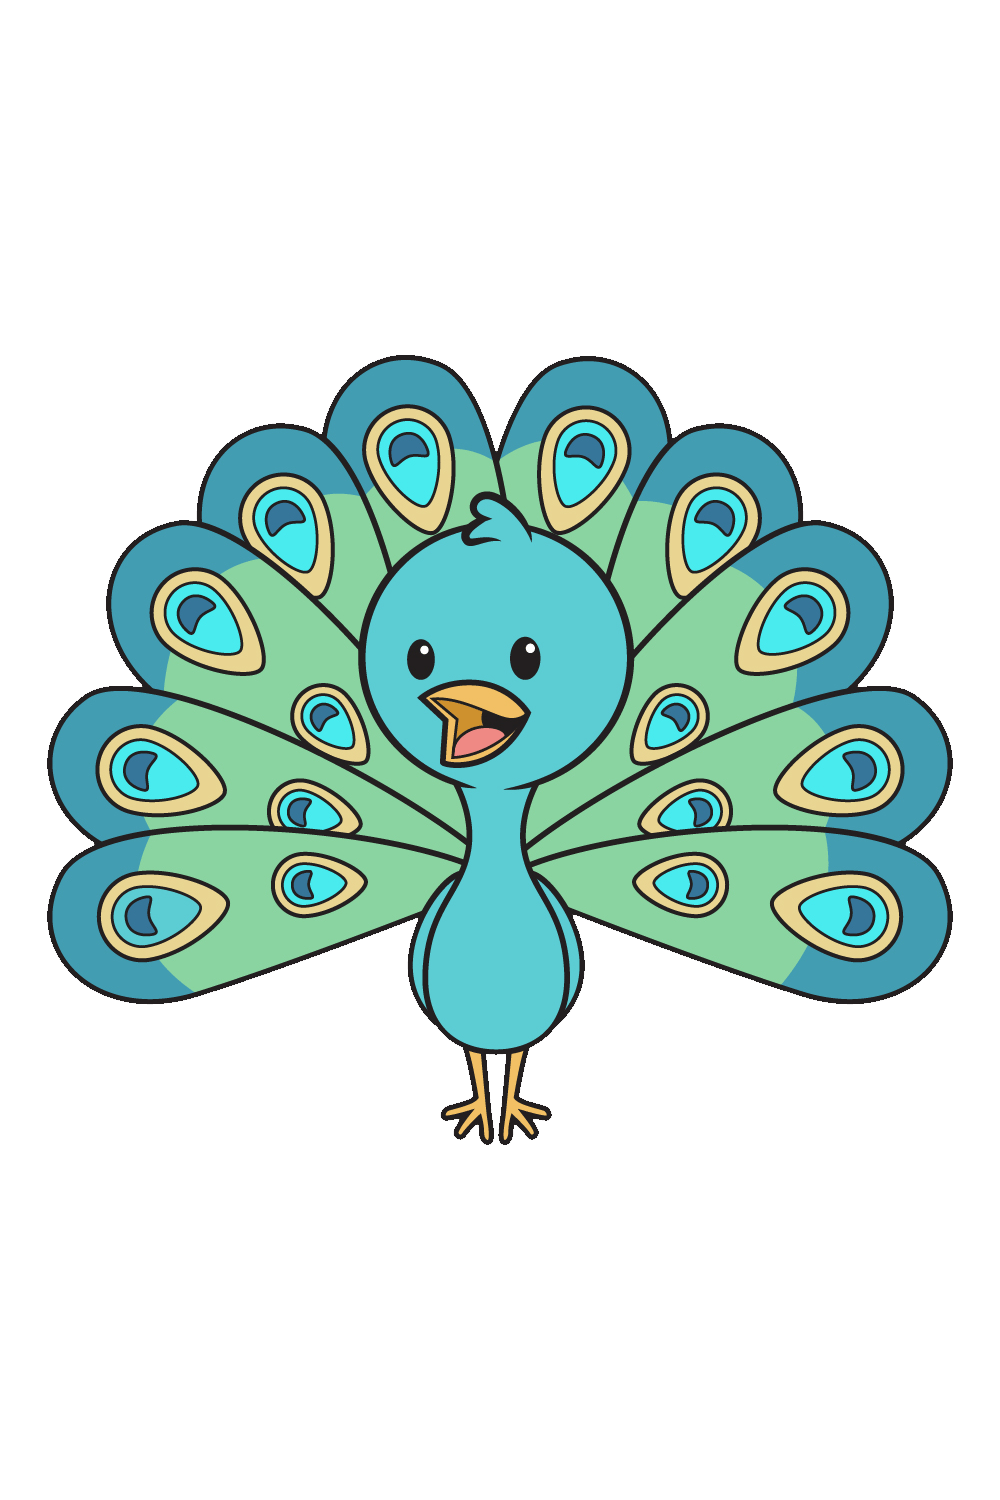
Peacock Drawing step by step
The peacock, otherwise called a peafowl, is a medium-sized bird that possesses tropical jungles with warm environments. They are especially known for their particularly beautiful tail feathers, which spreads into a superb fan that envelops the bird’s back and contacts the ground next to each other. The outrageous ubiquity and remarkable excellence of peacocks have made this an exceptionally mentioned drawing instructional exercise. So Learn P
Visit the cool spongebob squarepants drawing
In this way, we are right here, we have made a bit by bit instructional exercise on the most proficient method to draw a peacock, summarized in 9 simple and speedy advances. Every guidance accompanies a representation to make the means significantly simpler for you to follow.
Anyway, what are you sitting tight for? Feel free to get your pen and paper!
Stage 1 – peacock drawing
Start by portraying an ideal circle only somewhat over the center of your paper. Then, define a shifted W-formed boundary to make a fluffy surface at the highest point of the head. This is to guarantee that you can without much of a stretch dispose of any lines from the diagram that you never again need later on. This likewise helps keep your drawing refined and slick.
Stage 2 – Layout the Peacock’s Head and Body
Right under the head, draw a prolonged shape with a restricted upper part and more extensive base to make the body. When drawn accurately, the state of the body ought to look very like a jar.
Stage 3 – Next, Draw The two Legs of the Peacock
Draw meager legs one next to the other under the body of the peacock. Remember to add a foot with three paws at the lower part of every leg. Attempt to make the legs and the feet of the peacock indistinguishable however much as could reasonably be expected.
Stage 4 – Then, Draw the Wings of the Peacock
Encase a bended line on each side of the peacock’s body. The bended line ought to follow the layout of the peacock’s body, making the presence of a couple of wings entirely still on the sides of its body.
Stage 5 – A while later, Draw Half of the Quills
Presently, now is the ideal time to draw the most unmistakable actual highlights of the peacock, which is the quills on its back! It looks particularly gorgeous when it’s spread separated, so that is precisely exact thing we’ll attract this step. Go on by a stretched shape with a round base to make the principal feather connected on the rear of the peacock. Then, at that point, rehash similar strides until there are five plumes one next to the other. This structures the principal half of the peacock’s arrangement of spread out feathers.
Stage 6 – Presently, Complete the Spread Out Plumes
Draw one more five quills on the opposite side. Remember that all plumes ought to have a similar width and length. In the wake of finishing this step, there ought to now be a sum of ten quills on the rear of the peacock.
Stage 7 – Add Examples on the Initial Five Plumes
The example can be made by essentially drawing a topsy turvy thin drop shape. Then, draw a more modest shape with a comparable structure inside the one we drew seconds ago. A while later, draw a crescent inside the shape. That is all there is to it! Obviously, the examples might look complicated, however drawing that’s all there was to it! Observe that main the top example will be apparent on the quills in the center, as displayed in the outline.
Stage 8 – Next, Add Subtleties on the Plumes in general
Rehash the past step and continue to draw a similar example on each plume. In this step, you ought to wrap up drawing the examples on each of the ten quills of the peacock.
Stage 9 – Presently, Draw the Peacock’s Facial Highlights
To finish your drawing, draw the eyes and the bill of the peacock. Then, at that point, draw two little circles inside each eye. Presently, conceal the whole eyes aside from the small circles inside. This adds an emotional impact and makes the eyes seem as though it’s shimmering!
To make the snout, just draw a shape with a sharp edge on the right side and two on the left side. Remember to add a diagram inside the snout to refine the shape and make the presence of a tongue! That’s it — you have effectively drawn a delightful peacock! Presently, time for the part you’ve most likely been hanging tight for, which is filling in the shades of the peacock! Peacocks normally have brilliant blue bodies and the quills on their backs are a blend of metallic blue and green tones.
Notwithstanding, there are a couple of interesting types of peacocks that have pink, purple, and other lively shades. Shading a peacock will doubtlessly be fun since there’s an extensive variety of variety choices to look over. You can decide to variety the peacock utilizing their unique tones or utilize a redid set of varieties to make a stand-out peacock. One way or the other, we’re certain the varieties will end up being lovely!
Also Read abc b news